Principles of Data Visualization in R Workshop: Setting up free hosting for your website on Github
Willy Chen
Workshop 5.5
Click here to return to the menu
In this workshop, will teach you how to sign up for GitHub, set up your own repository linked to your desktop, and be able to use it for free hosting of your website.
GitHub
GitHub is one of the most widely used FREE online platform that allows you to upload stuff onto it for project cooperation, co-development, etc. We won’t get into the weeds of how to properly use GitHub but I want to walk you through setting up GitHub on your computer so you can upload websites for most purposes. We will talk more about how to write a html website in the next workshop. For now, you can use this sample site [Click to Download] that I personally wrote for you.
Sign up for GitHub
To sign up for GitHub, go to github.com. Once you are on the site, You will see the following page: 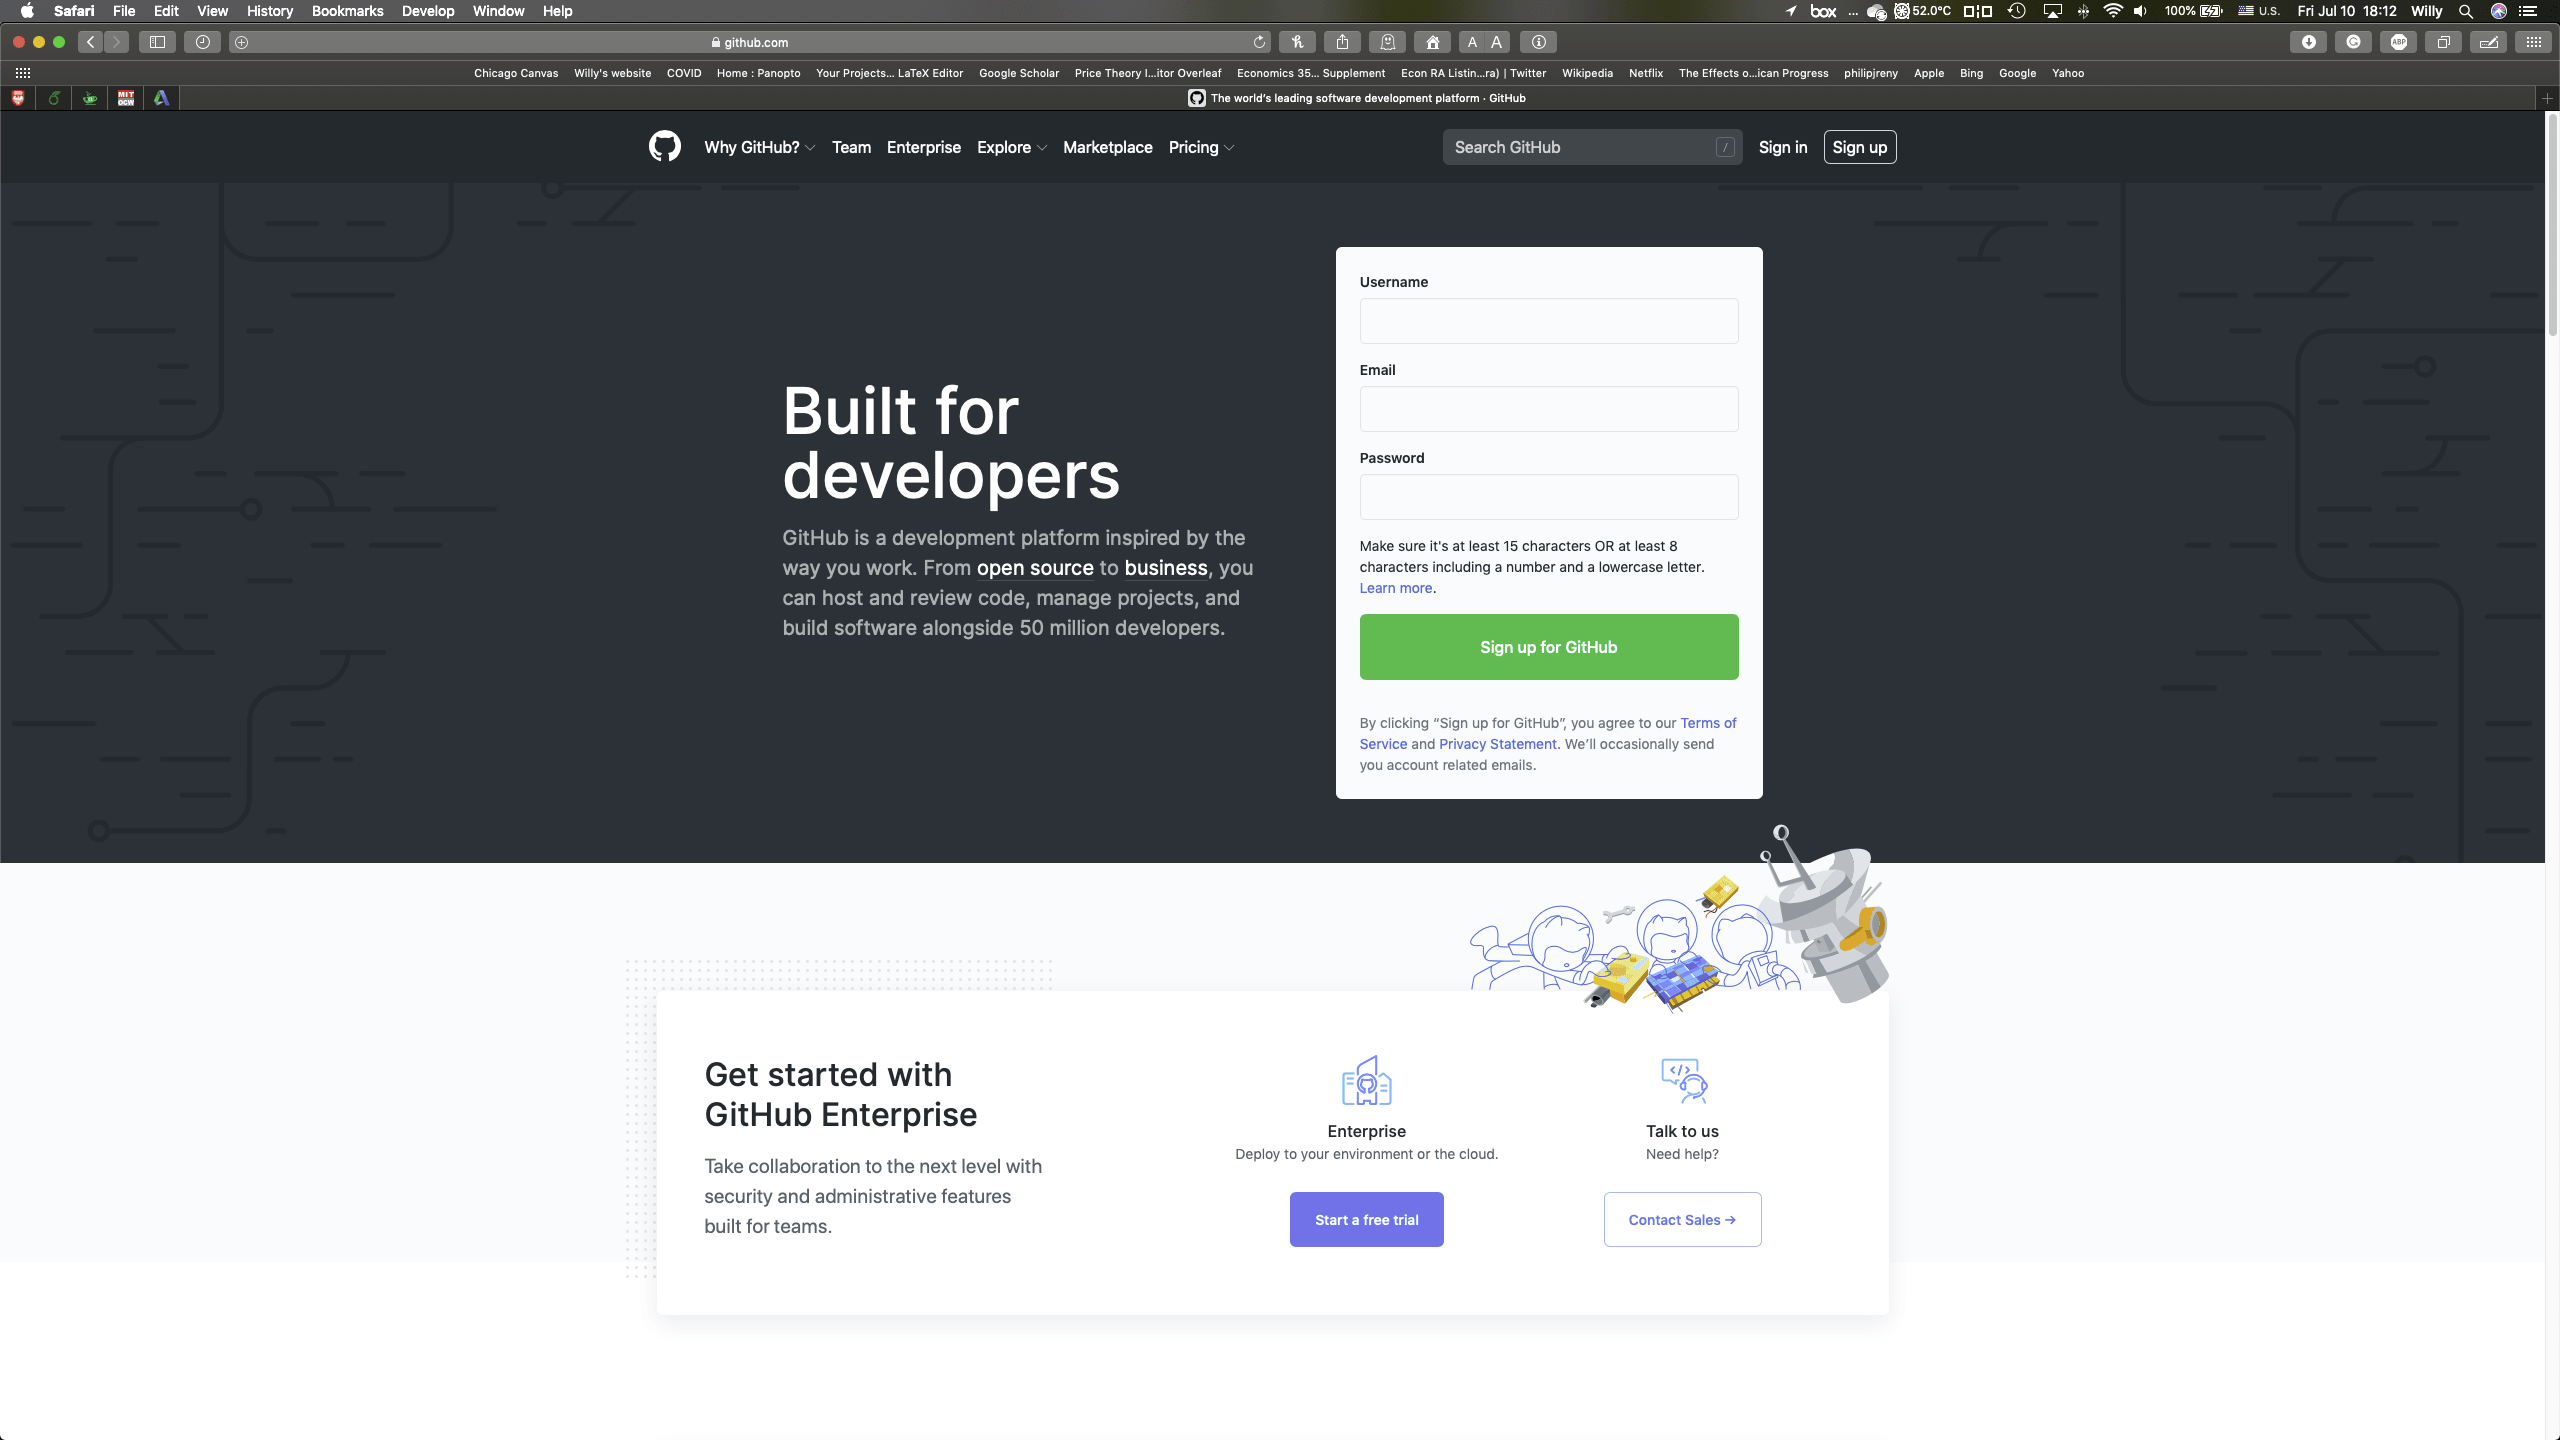 Now type in a Username that is available to be your username. You should make this relatable and easy to remember as this will be the prefix of your site name as well as your login information. For example, my GitHub username is
 WillyTheWoo.
Enter the email you want to use to be associated with your account. Make sure you have permanent access to this email. Then put in a password that you will remember. Once you are signed up, GitHub may ask you to verify your email by sending a verification to the email you provided. Follow the instructions to verify your account and log in to GitHub.
Setting up your online repository
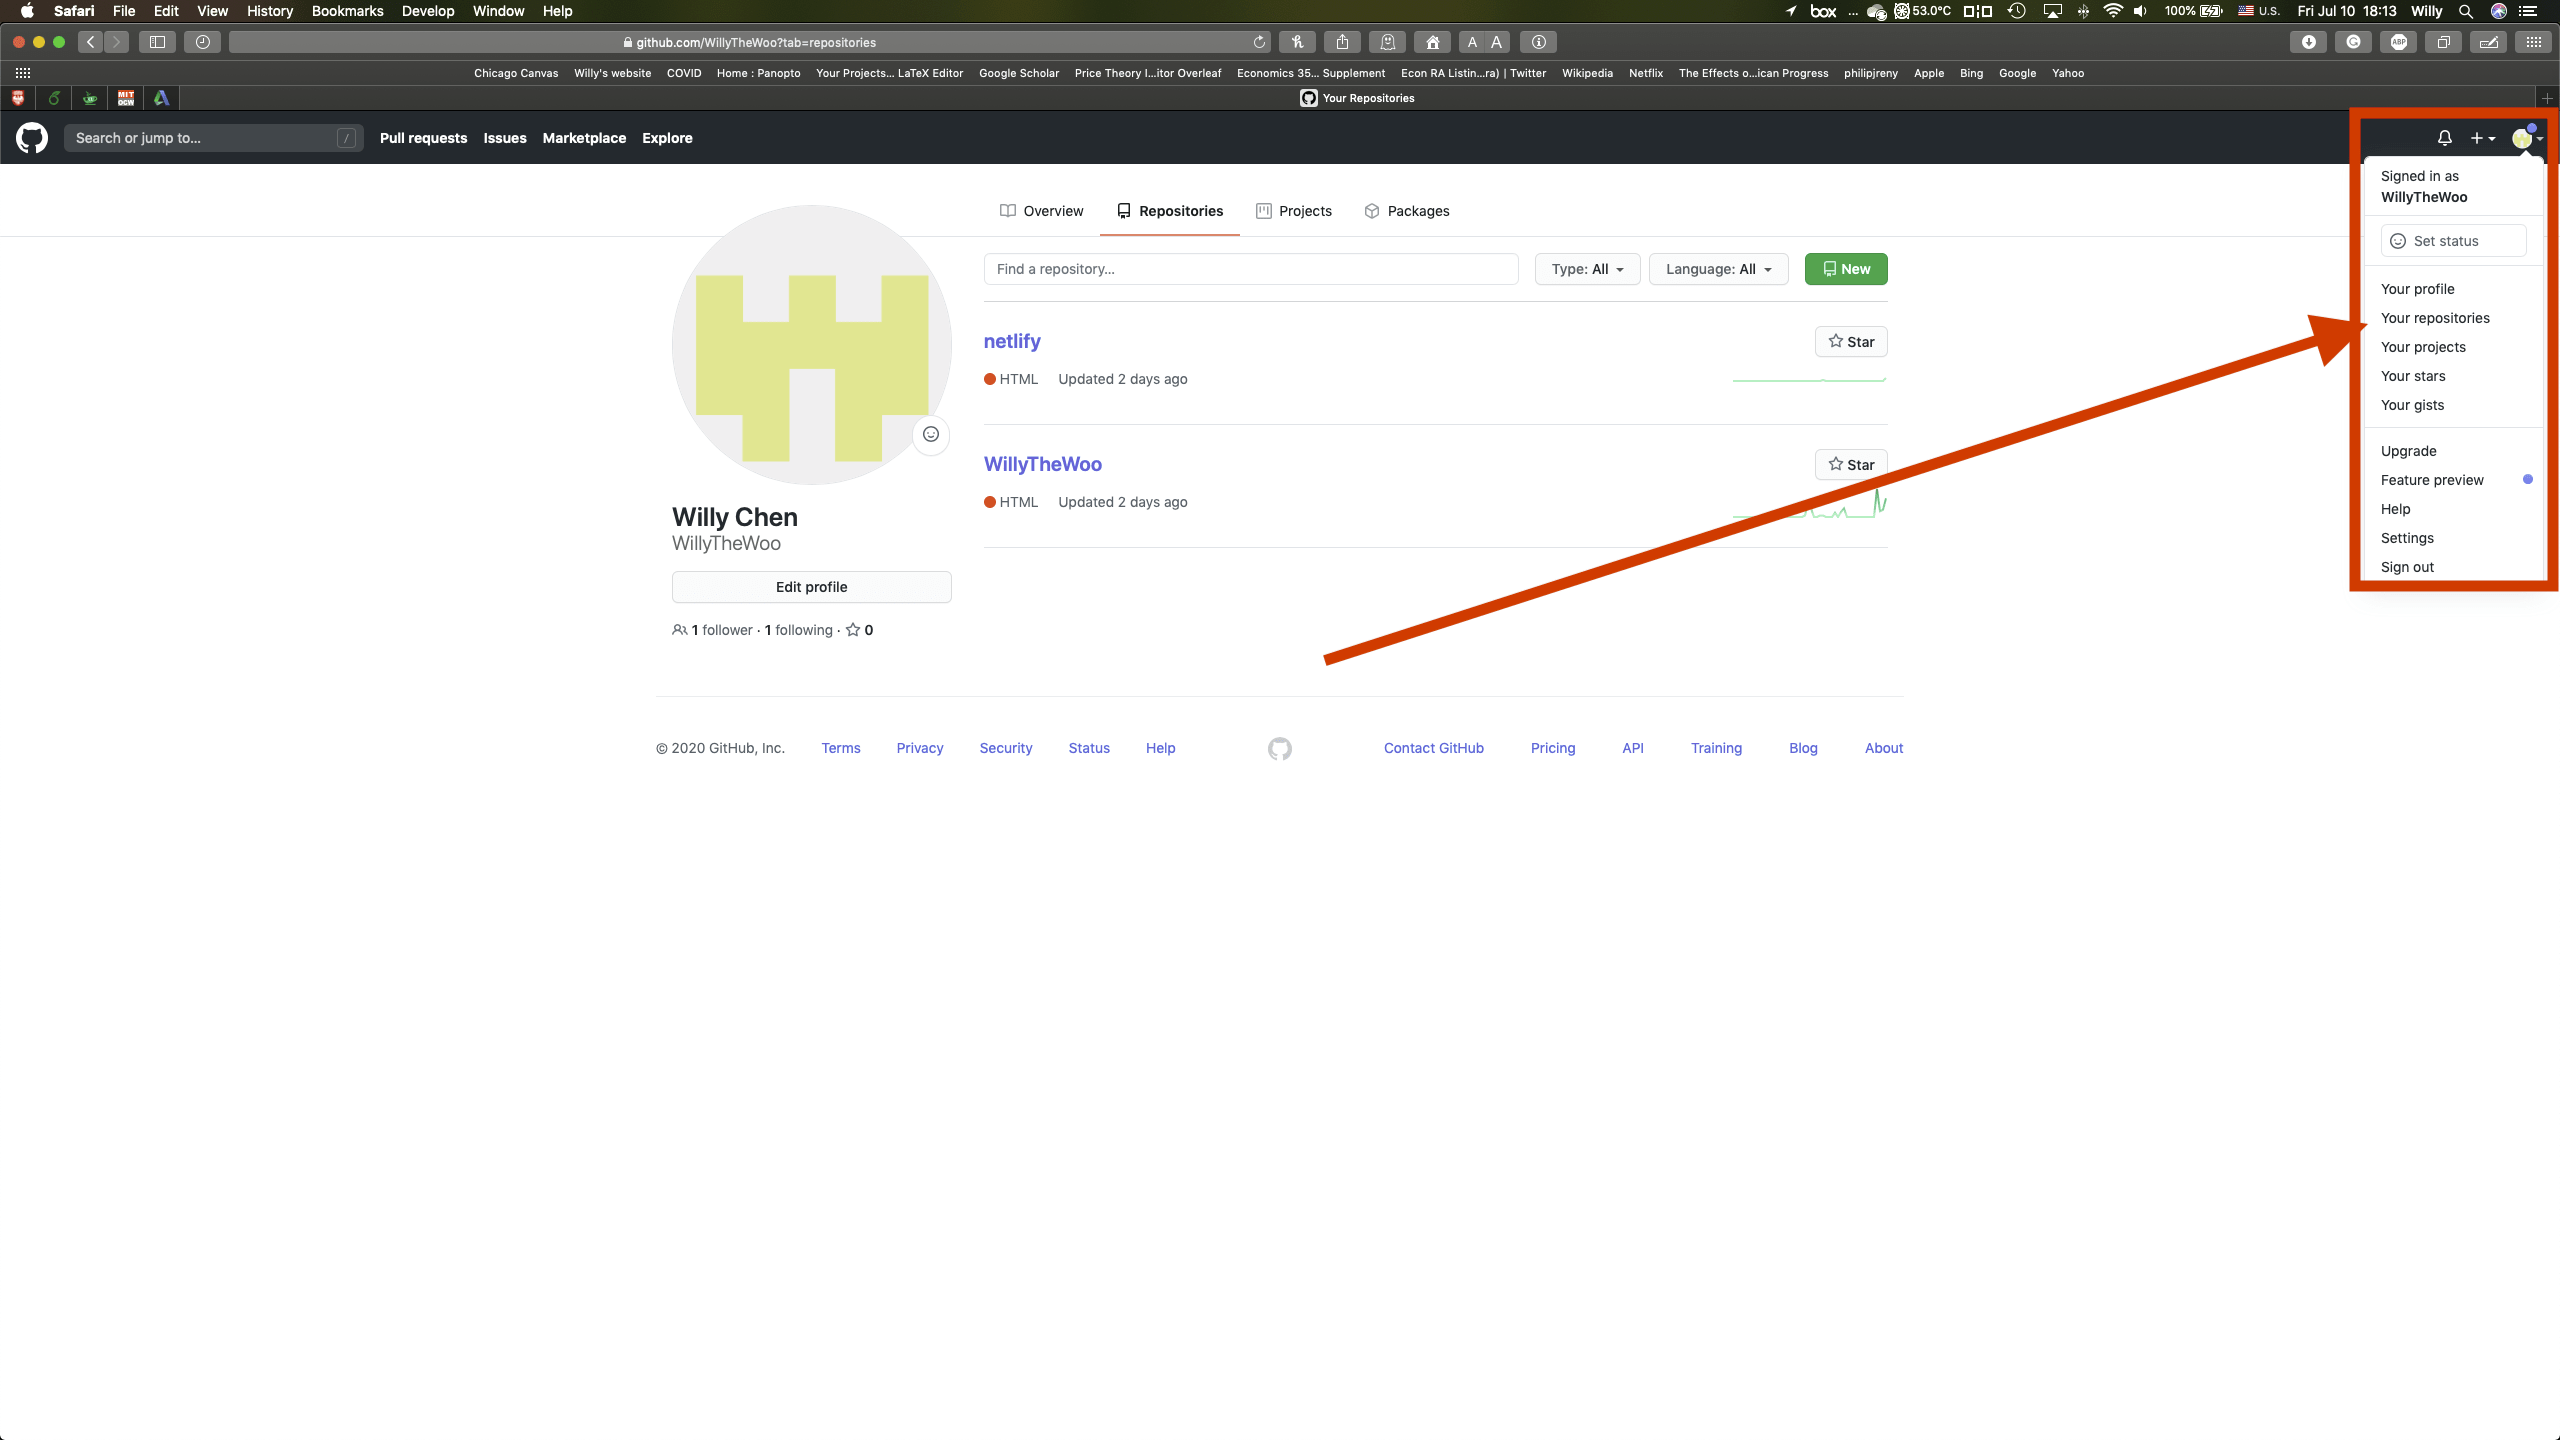
Repository is essentially just a fancy way to say cloud drive. Once you set up your repository, you will be able to upload files onto it. If your repository is public, anyone with a link to your repository will be able to access the files you put in it. To set up your repository, click on your profile picture on the top right corner after you log in to GitHub. This triggers a drop down menu from which you should select Your repositories like this:
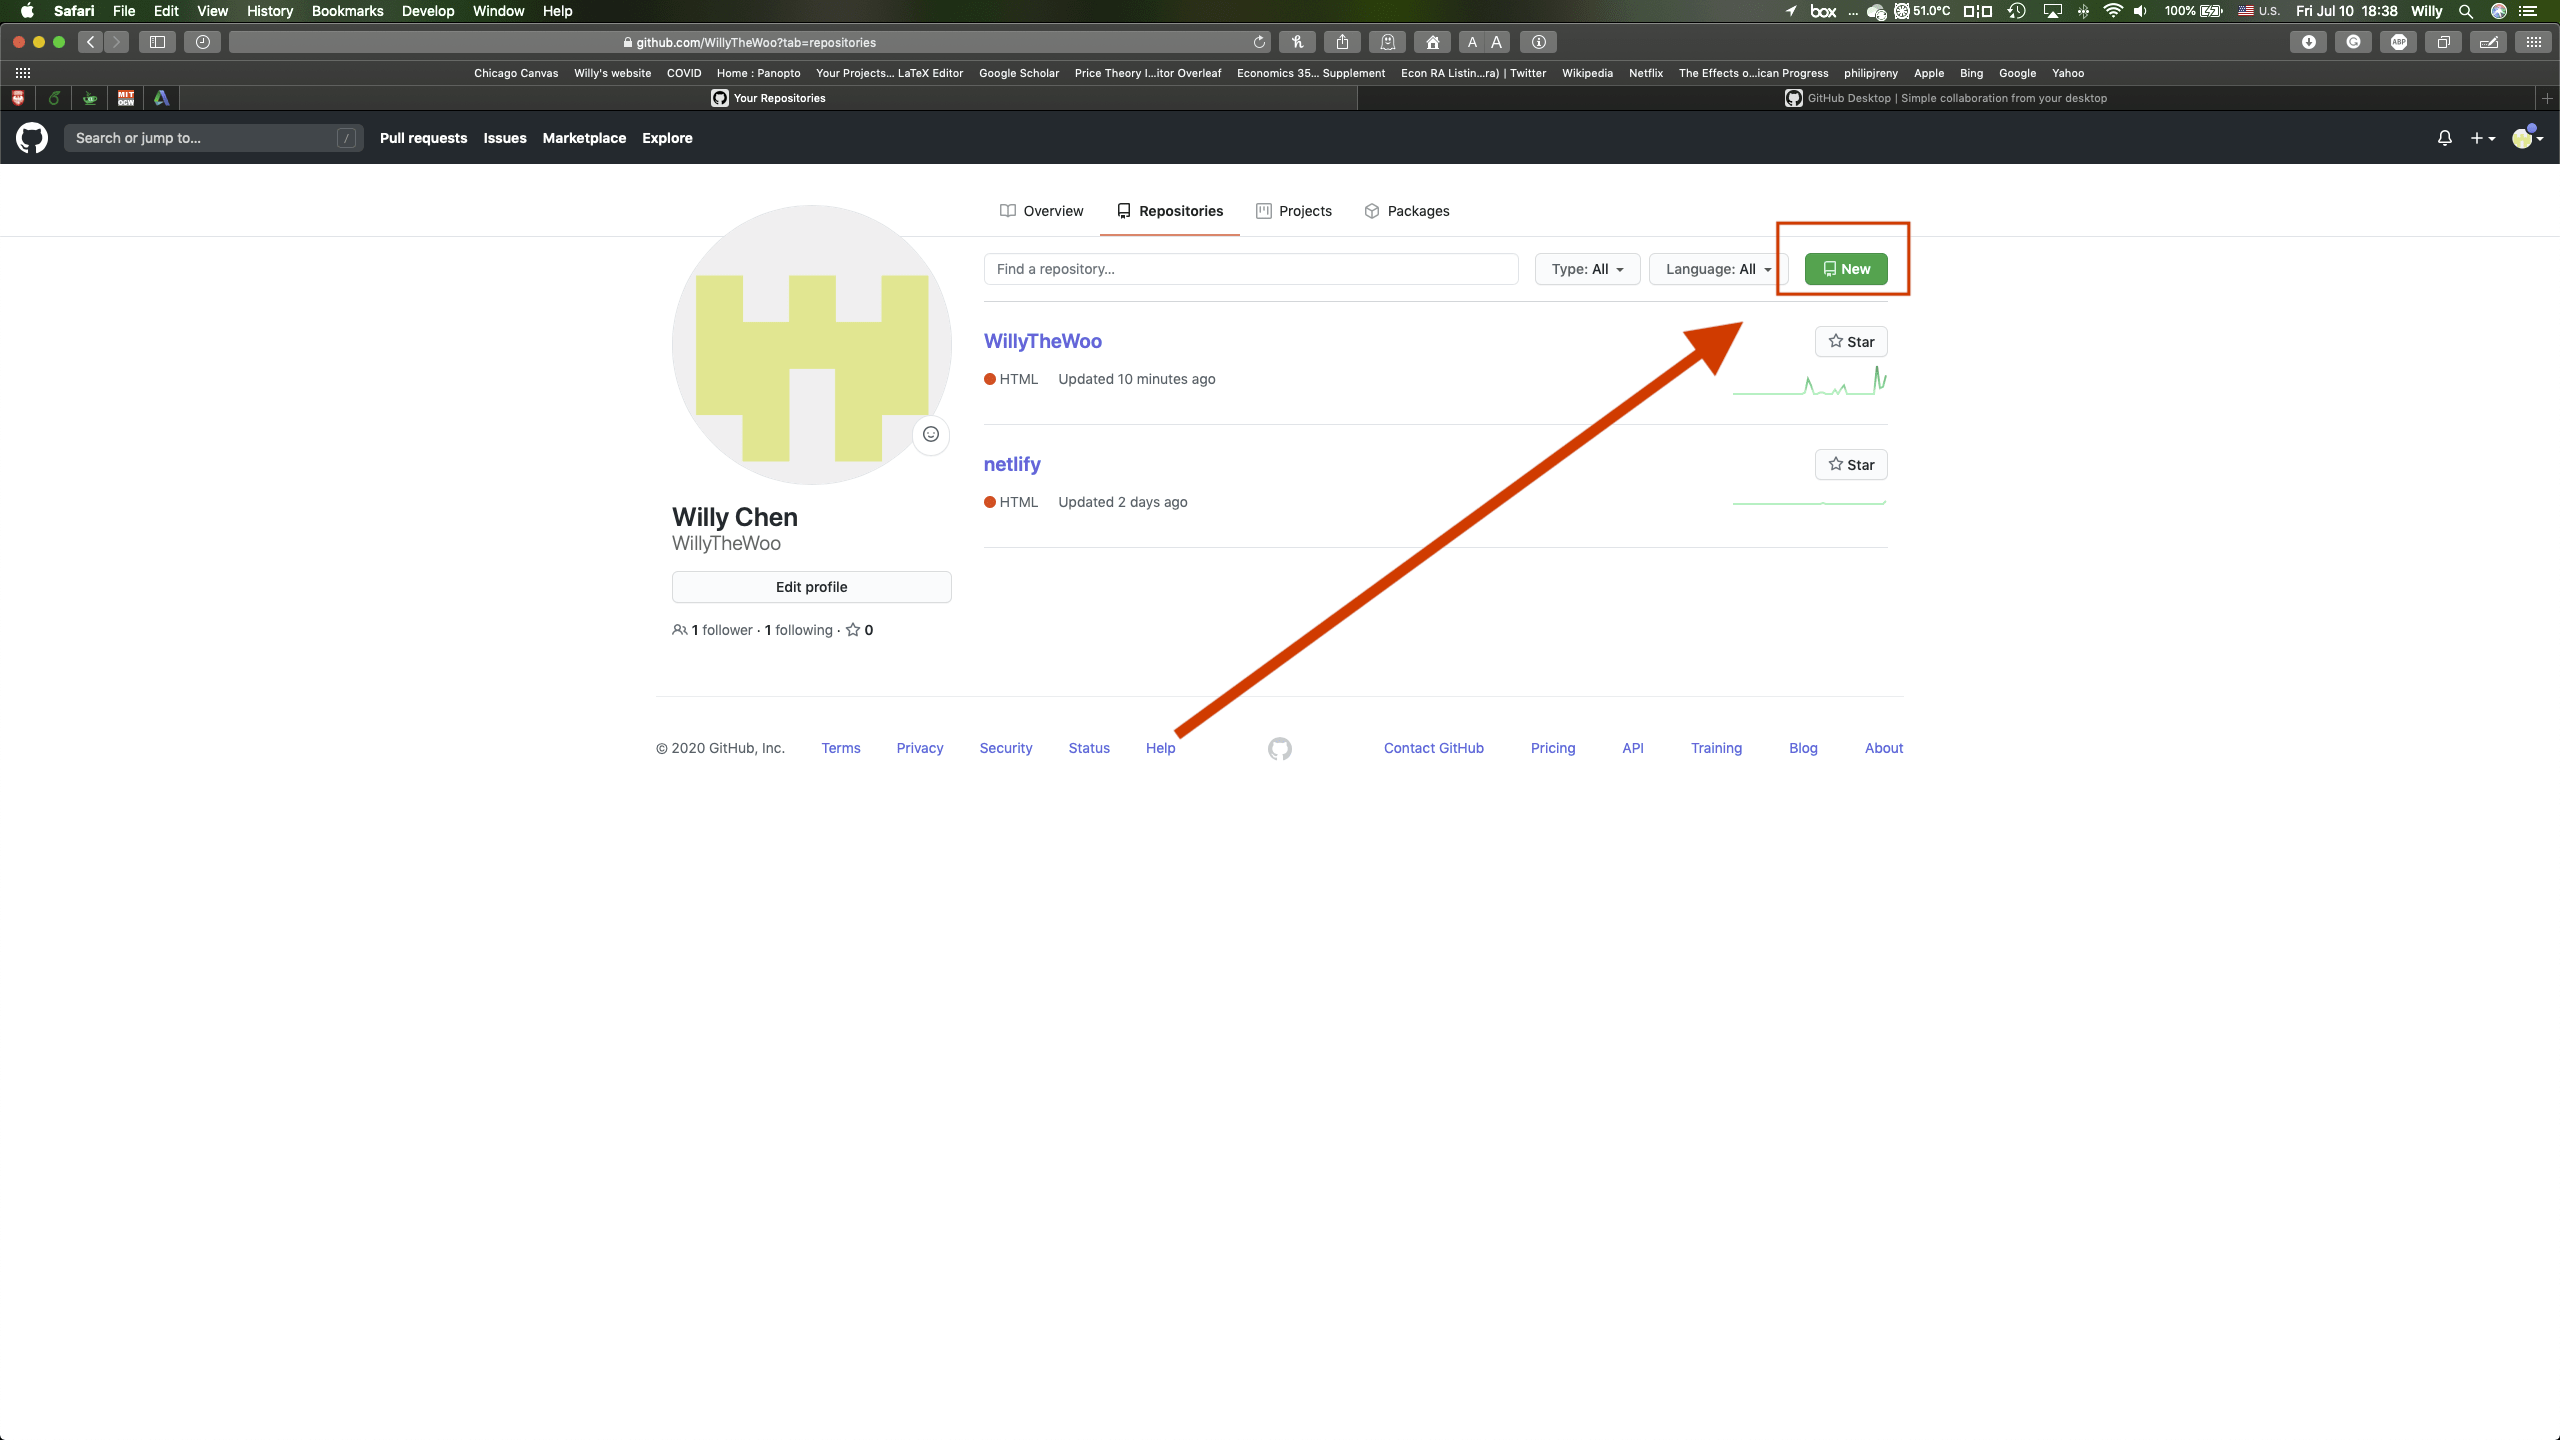
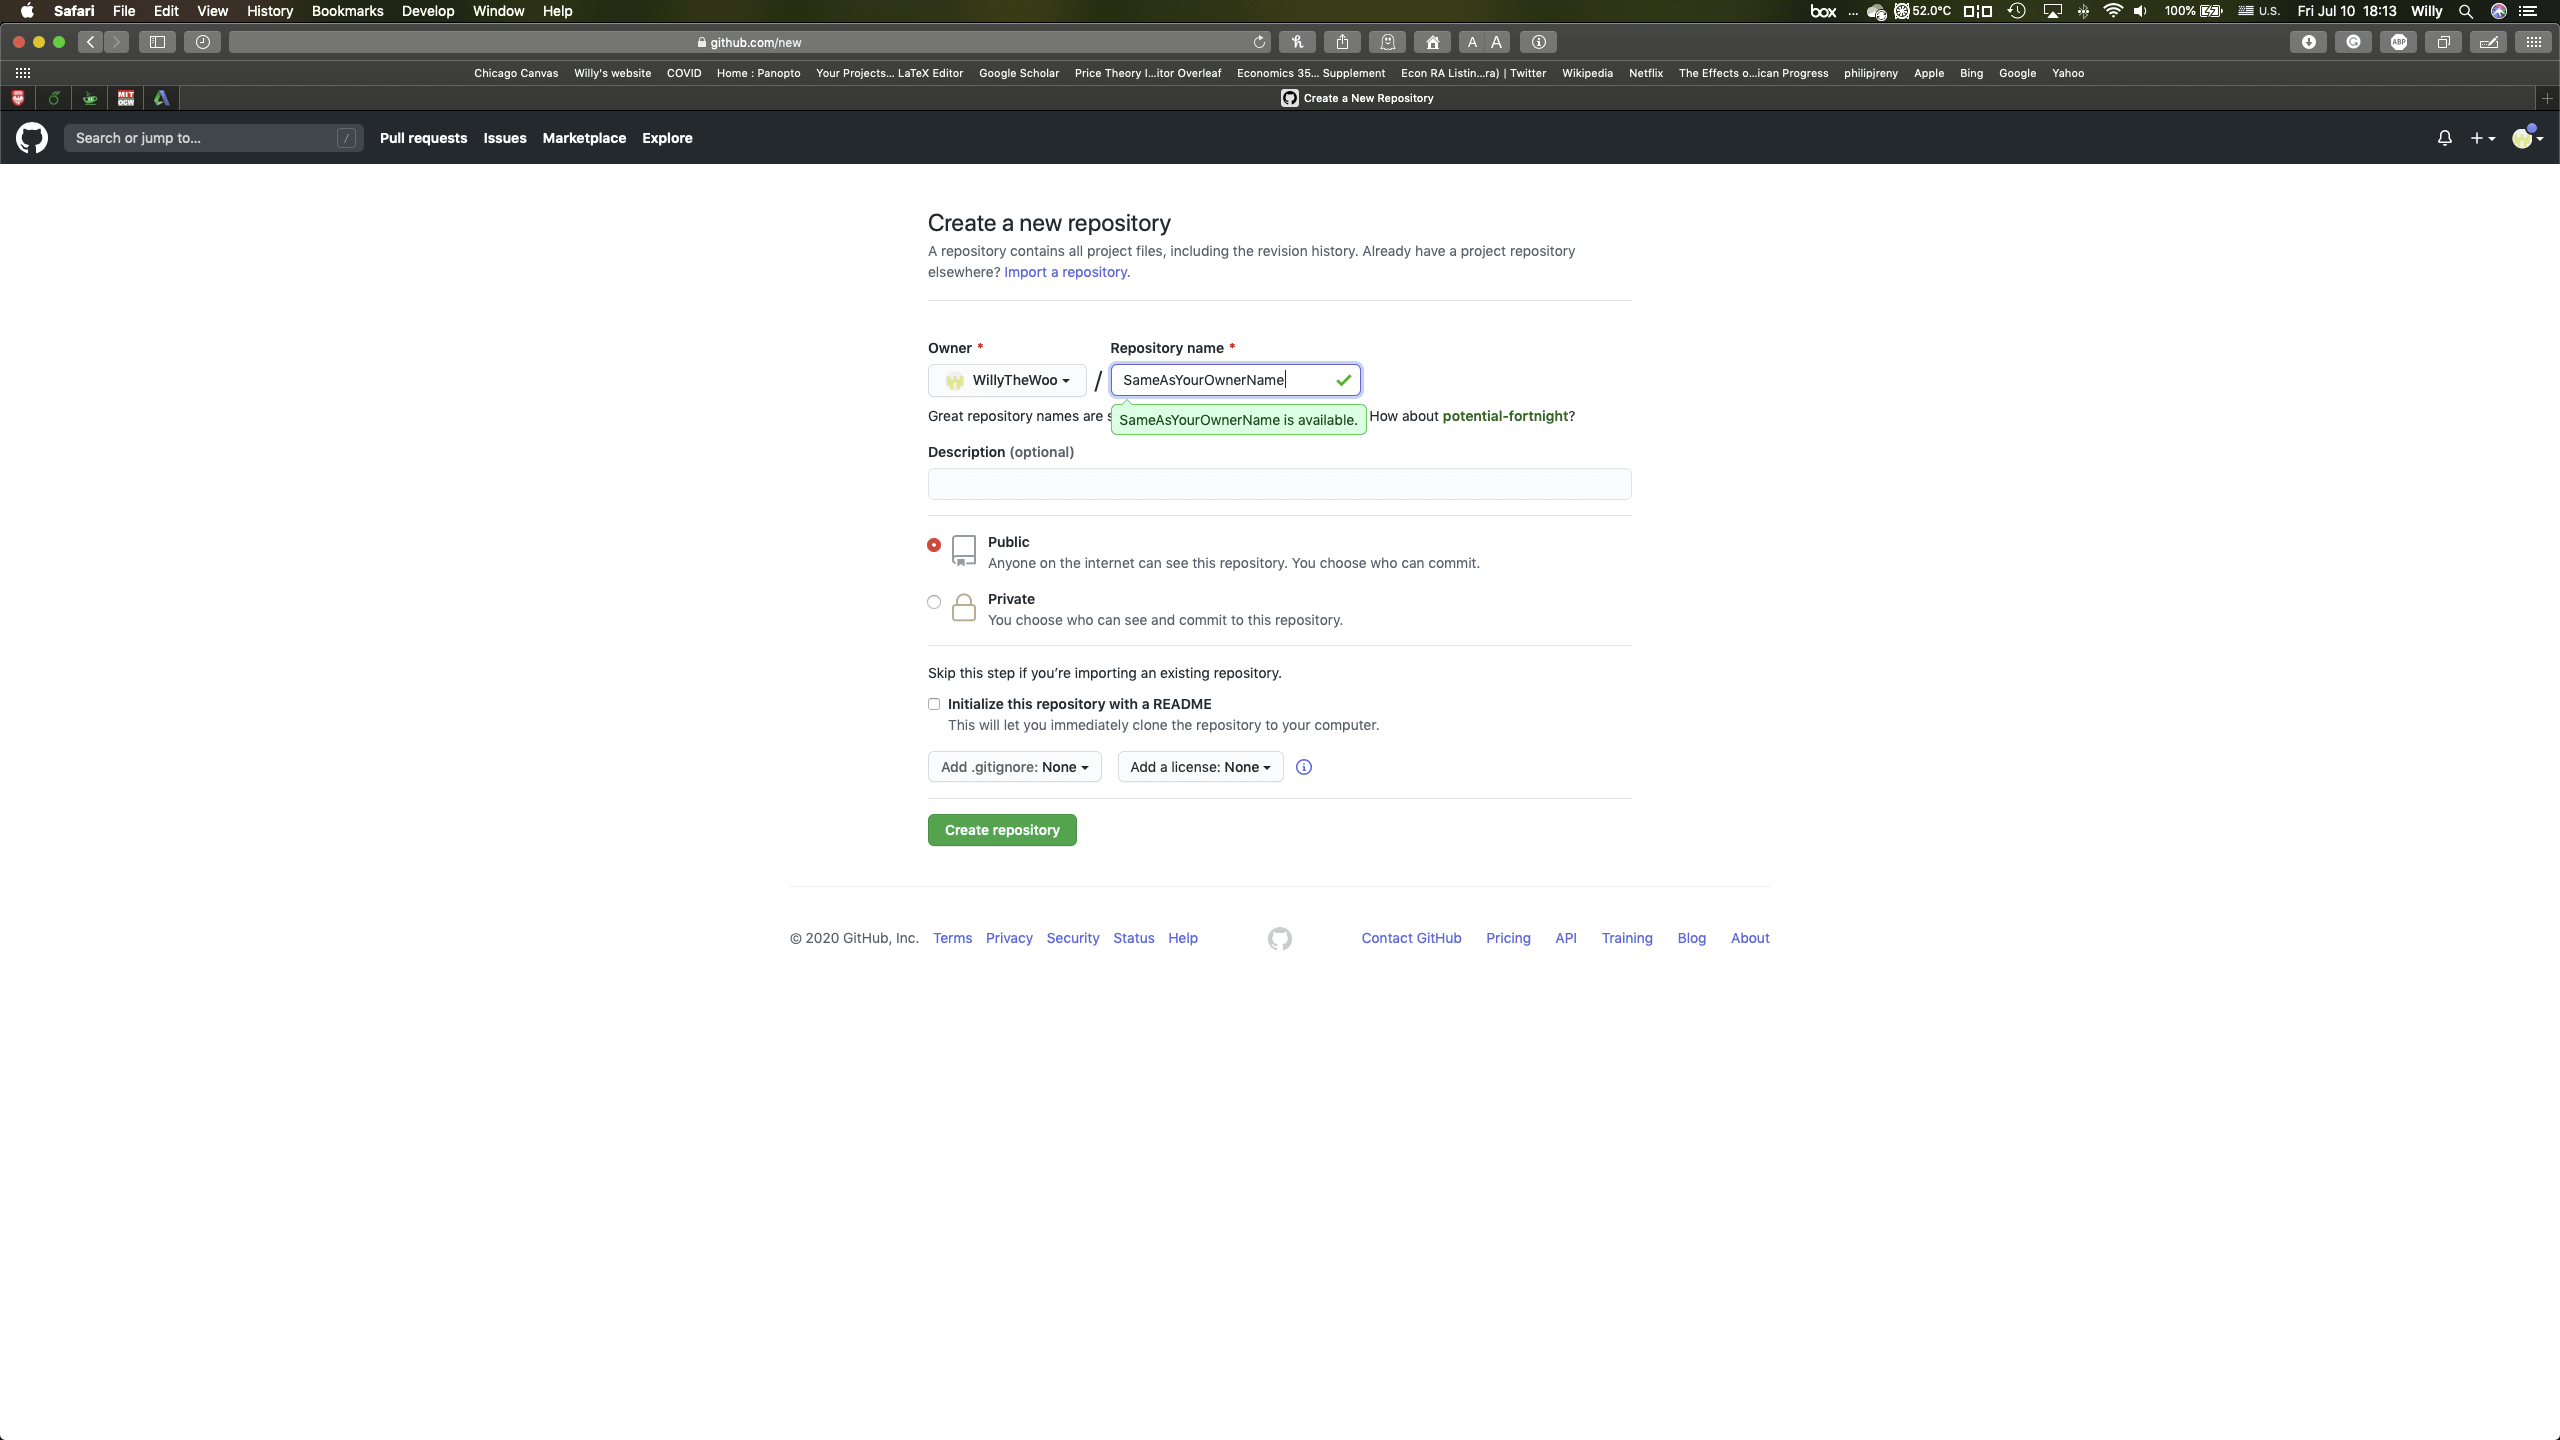
Once you can see your list of repositories (You probably can’t since you haven’t created any), click on the new button to create a new repository.
Important You NEED to name this repository the same name as your username. This prompts GitHub to use your repository as a site automatically.
Setting up Github Pages
Now that your GitHub repository is set, we need to find an easier way for you to be able to push (upload) files on to it. But for GitHub to actually publishes your html as a site, you need to set it that way. To do so, go to the settings panel of your repository, scroll down to the section “GitHub Pages” and click the button below source and change it from “None” to “Master branch”.
Github Desktop
To easily connect your computer to your GitHub repositories, you need the GitHub Desktop app. Download one of the following files according to your system.
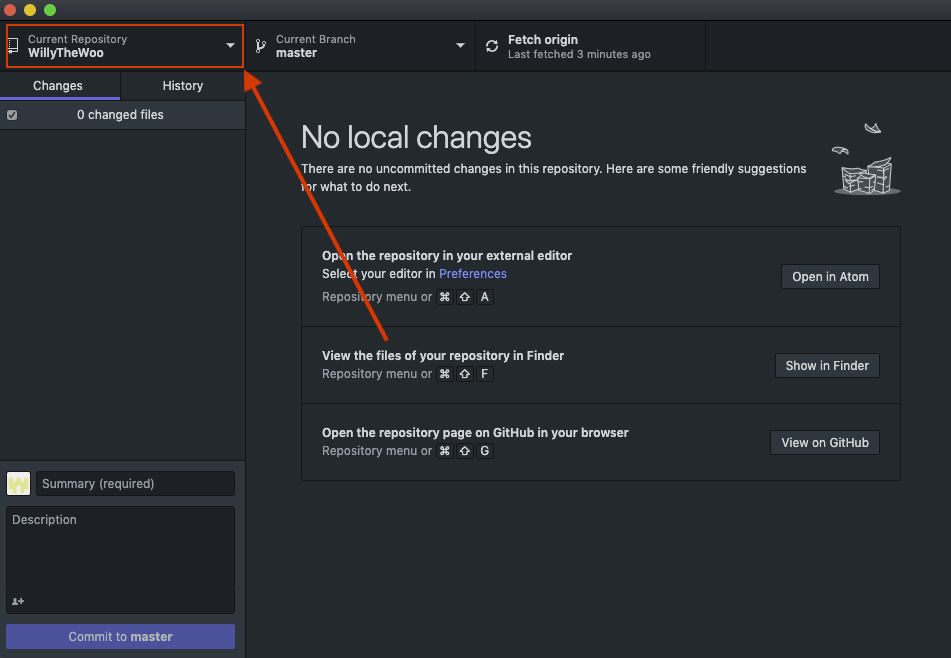
After downloading, click on the file to install it and then launch the app. You will then be prompted to sign in to your GitHub account. Once you are signed in, you can click on the button that says Current Repository:
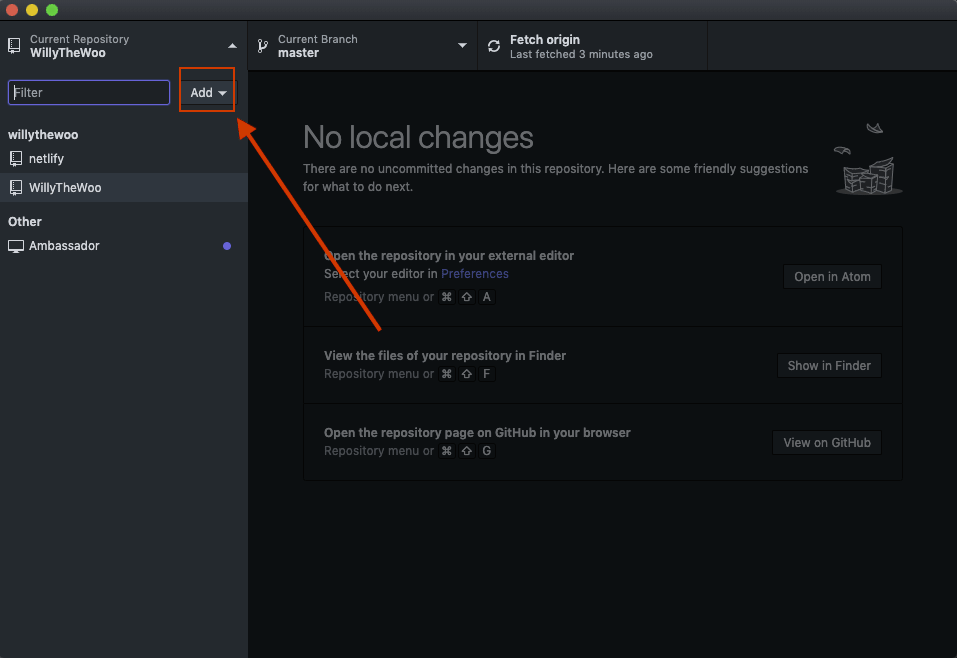
After you click on Current Repository, you will see an add button. Click on it and select Clone Repository
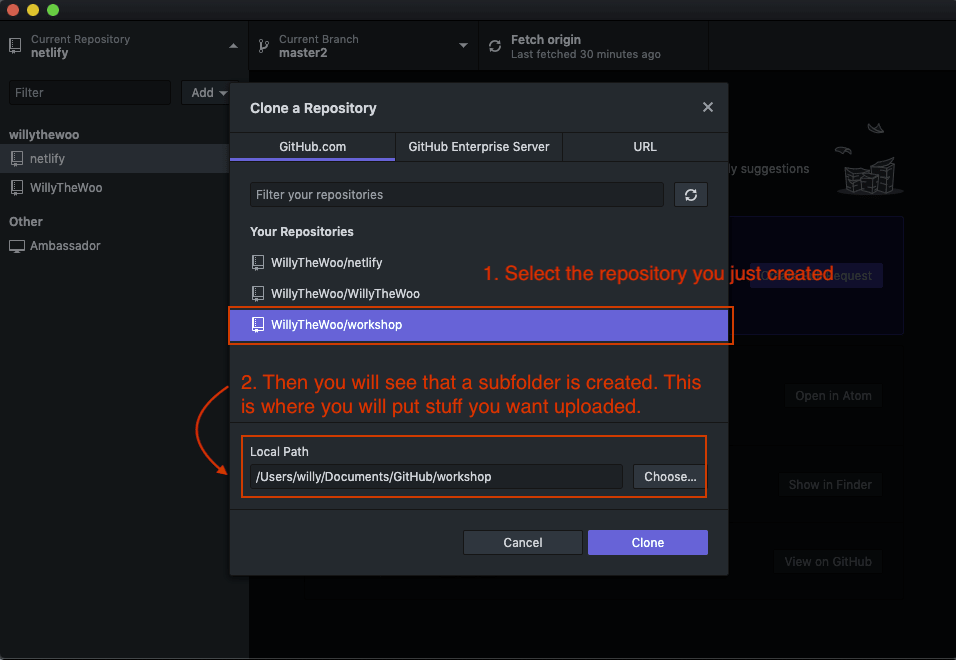
Then you will be prompted to select which repository you want to clone to your computer. Select the repository you just created (I used the repository “workshop” because I already have a repository same as my username. You should choose the one named after your username.). Noticed that when you choose a repository, GitHub Desktop will automatically create a sub folder under your main directory for GitHub. Everything you want to push to this repository on GitHub should be put in this folder on your computer. This folder is called your local repository.
Commit and push to repository
GitHub is a version control tool which allows you to test your files locally first and then push it live later. When you move a file to your folder, GitHub Desktop will show you what the changes are. If you are sure with your change, you will tell GitHub Desktop to push it to your online repository and thus making the changes live.
If you haven’t already, download the sample html site I provided at the beginning [Click to Download the sample site] . Put that file into your local repository and then look at GitHub Desktop. You should be able to see a screen like this (Note that when I wrote this workshop, I also have to upload a styling file so the files in the picture below are not exactly what you will see):
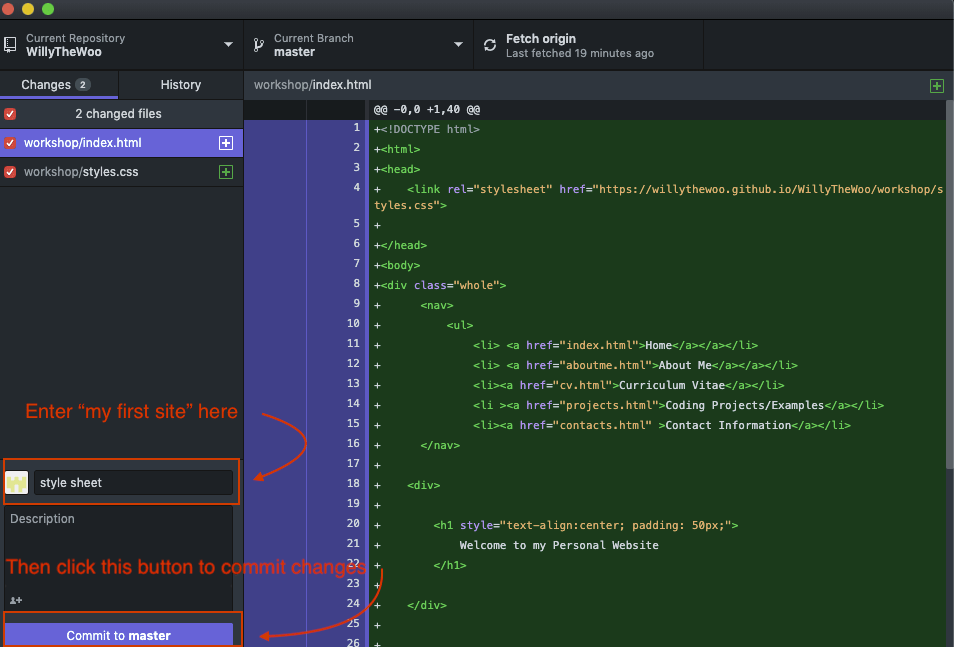
To commit and push, you need to type some words at the summary part (See the picture above) and then click on the Commit to master button. Then click on the Push origin button or you can use command + P for Mac or control + P for Windows.

Once it finishes pushing, your sample website will be live in a couple minutes! You will be able to access it at:
https://yourusername.github.io/yourusername/
Go on to the next workshop to see how you can create html websites using RMarkdown and then publish it to GitHub!
Click here to continue to the next workshop: Introduction to RMarkdown